
Ever looked at a scratched cabinet or outdated fridge and thought, Can you vinyl wrap anything to give it a fresh new look? I’ve wondered the same—and after wrapping my bathroom vanity (yes, even the tiles!), I realized how powerful and budget-friendly vinyl wrap can be. From smooth wood to tricky corners, I’ve tried it all—and I’ve learned what sticks, what fails, and how to remove stains from vinyl wrap without damage. In this guide, I’ll break it all down: what works, what doesn’t, and what you need to know before wrapping your next project. Let’s dive in and see what’s really possible—because sometimes, the smallest change can make the biggest difference.
What Is Vinyl Wrap?
Vinyl wrap is a thin, flexible film with an adhesive backing that you can stick onto surfaces to change their look, kind of like a high-quality sticker, but much more durable. It’s made from PVC (polyvinyl chloride), which gives it that balance between flexibility and strength. I first discovered vinyl wrap while trying to refresh my kitchen cabinets on a tight budget, and honestly, I was shocked by how professional the results looked without any paint fumes or sanding mess.
Now, let’s clear up a common mix-up: vinyl wrap isn’t the same as contact paper. Contact paper is usually thinner, less durable, and tends to peel or bubble over time—especially in moist areas like bathrooms. Vinyl wrap, on the other hand, is designed for tougher jobs. It hugs curves, resists water, and holds up under daily use. That’s why many people ask, “Can you vinyl wrap bathroom tiles?”—and the answer is yes, but only if you prep them well and choose the right type of wrap.
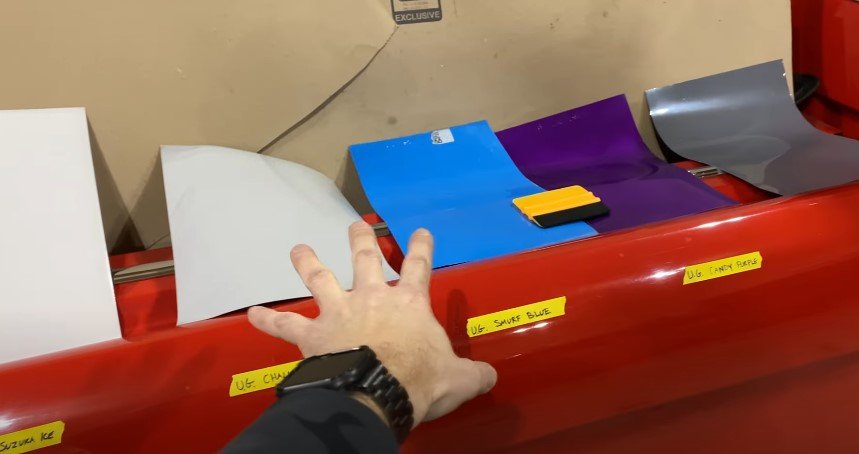
Speaking of types, vinyl wrap comes in a whole range of finishes:
- Matte for a soft, modern look
- Gloss for a high-shine, sleek finish
- Wood grain that can fool the eye on furniture makeovers
- Textured finishes like carbon fiber, concrete, or even brushed metal
Personally, I love the textured ones—they give your surfaces personality without the commitment or cost of a full renovation. Whether you’re covering a cabinet, fridge, or even a laptop, there’s a vinyl style that fits.
Can You Vinyl Wrap Anything?
Great question—and one I asked myself the first time I discovered vinyl wrap while trying to update my bathroom vanity. The truth is, vinyl wrap is incredibly versatile, but that doesn’t mean it sticks well to everything. So, can you vinyl wrap anything? Not exactly—but you can wrap a lot, as long as you understand what works and what doesn’t.
Let’s break it down:
Ideal Surfaces for Vinyl Wrap
These are your best bets—vinyl wrap sticks beautifully and lasts longer here:
- Wood (especially smooth, sealed wood)
- Metal (like appliances or desk legs)
- Laminate (think IKEA furniture and kitchen cabinets)
- Glass (doors, mirrors, panels)
- Plastic (like bins, consoles, or electronics)
I’ve personally wrapped both a laminated cabinet and a glossy plastic shelf. The key? A clean, flat surface. The vinyl clung on like a second skin and still looks fresh months later.
Challenging Surfaces
These need extra prep—or might test your patience:
- Textured walls or tiles
- Uneven furniture (with dents, gaps, or deep grain)
- Porous surfaces (like raw wood or stone)
Take bathroom tiles, for example. People often ask, “Can you vinyl wrap bathroom tiles?” Yes, you can—but only if they’re clean, smooth, and non-porous. In my case, I had to degrease the tiles twice and use a heat gun to really press the wrap into the grout lines. It worked, but it wasn’t as easy as wrapping a flat cabinet door.
Surfaces to Avoid
Some surfaces just don’t play nice with vinyl wrap—either due to adhesion issues or long-term durability:
- Fabric or upholstery
- Raw drywall or plaster
- Oily or greasy tiles (especially without proper cleaning)
Popular Vinyl Wrap Applications
Vinyl wrap has come a long way from just being a car enthusiast’s trick. Today, it’s everywhere—in kitchens, bathrooms, bedrooms, even on laptops. If you’re thinking about giving your space or stuff a budget-friendly facelift, here’s where vinyl wrap truly shines.
Kitchen & Bathroom Cabinets
If your cabinets look outdated but replacing them isn’t in the budget, vinyl wrap is a game-changer. It’s affordable, renter-friendly, and surprisingly durable when applied correctly. I first tried it on my bathroom vanity—and honestly, I didn’t expect it to hold up in such a humid space, but it’s still going strong over a year later.
A few quick tips from my experience:
- Prep is everything. Clean, sand lightly, and make sure the surface is dry.
- Use a heat gun around corners and edges for a smooth finish.
- Maintenance? Just wipe with a damp cloth—no harsh chemicals.
Design-wise, the options are endless: matte black for a modern vibe, wood grain for a cozy farmhouse look, or glossy white for that clean, minimal feel.
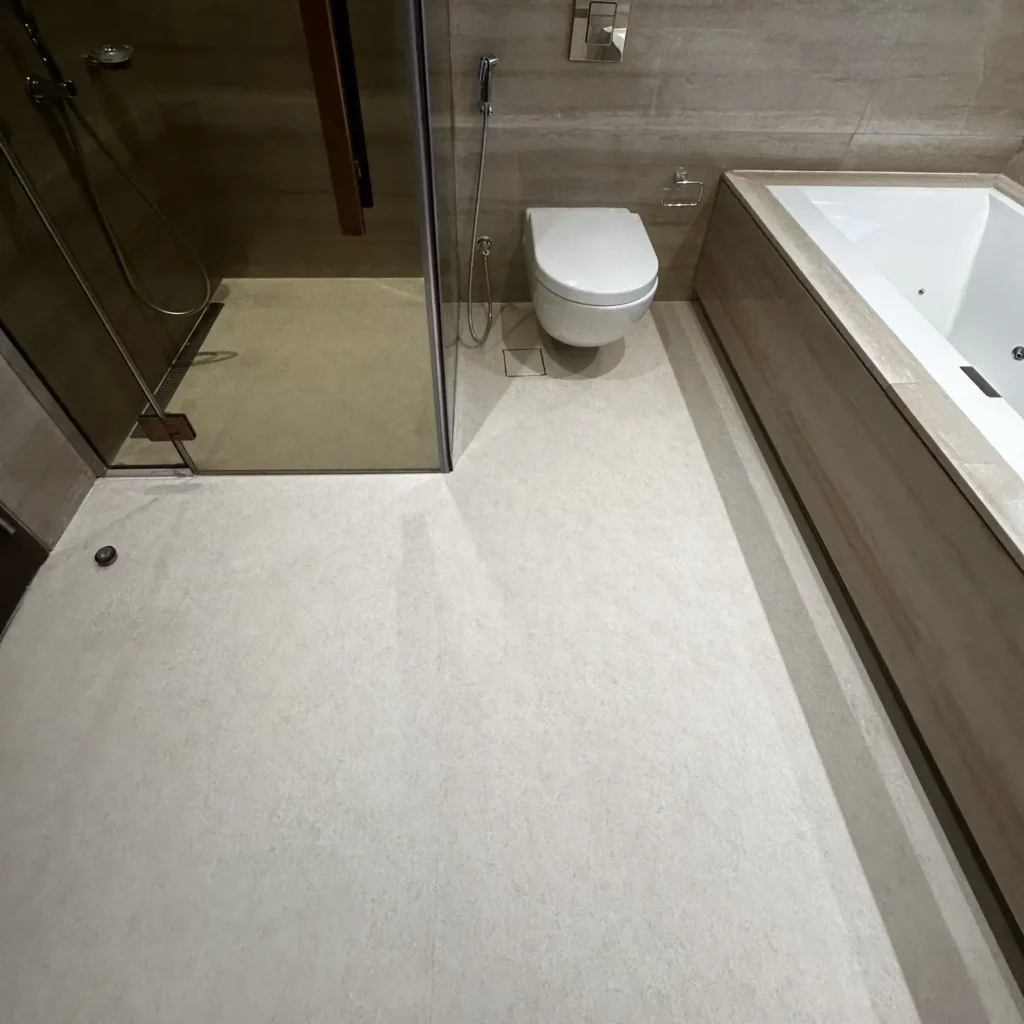
Can You Vinyl Wrap Bathroom Tiles?
Yes, you can vinyl wrap bathroom tiles—but it’s not always easy.
Tiles in high-moisture areas like showers may not be the best spot. But for backsplashes or decorative wall tiles, vinyl wrap can totally work. I wrapped a set of old beige tiles behind my sink with a marble-effect wrap, and it instantly modernized the space.
Here’s what I learned:
- Make sure the tiles are clean and degreased (soap residue is your enemy).
- Wrap each tile individually for a more natural look.
- Use a sealing edge or silicone strip around corners to avoid lifting.
It won’t be as waterproof as real tile or grout, but it can hold up well in low-splash zones with good ventilation.
Furniture & Appliances
This is where the fun really begins. You can wrap:
- Dressers, desks, and nightstands for a full makeover.
- Fridge or washing machine doors to cover scratches or match your decor.
I once turned a plain IKEA table into a faux concrete piece using textured vinyl wrap—and guests genuinely thought it was stone!
Popular finishes include:
- Marble (great for countertops or tabletops)
- Concrete (industrial look)
- Stainless steel (appliance upgrade without the cost)
It’s like giving your old furniture a second life, without buying anything new.
Vehicles and Electronics
If you’re tech-savvy or love customizing, vinyl wrap has you covered—literally.
For cars, wraps can go on interiors (like dashboards or trims) and exteriors (hoods, mirrors, even full bodies). I’ve helped a friend wrap their car’s roof in matte black, and it changed the whole aesthetic—plus it protected the paint underneath.
Smaller wraps work wonders too:
- Laptops and gaming consoles for a sleek or playful touch.
- Phone cases and chargers to match your setup.
Just be mindful with heat-sensitive electronics—make sure there’s no blockage around vents and ports.
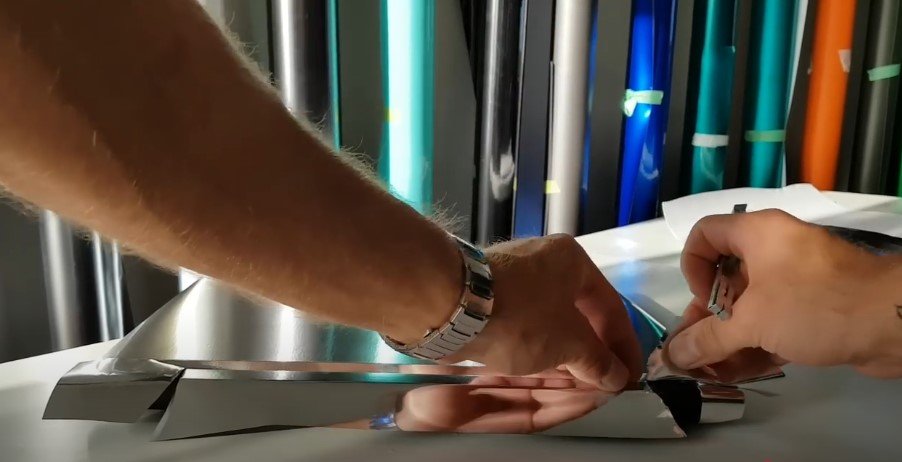
How to Prep a Surface for Vinyl Wrapping
If there’s one thing I’ve learned from wrapping everything from bathroom vanities to old coffee tables, it’s this: prep is everything. You could have the best vinyl wrap in the world, but if the surface underneath isn’t ready, it won’t stick—or worse, it’ll peel within days. So let’s talk about how to prep your surface the right way.
1. Clean and Degrease Thoroughly
Before you even think about unrolling your vinyl, start with a deep clean. Dust, oil, and grease are the biggest reasons wraps fail to adhere. I use a mix of warm water and mild dish soap for most surfaces. For anything greasy (like kitchen cabinets), a spritz of isopropyl alcohol or a degreaser works wonders.
Tip: Don’t just wipe once—clean it like you’re prepping for paint. Pay special attention to corners, handles, and edges where grime loves to hide.
2. Sand and Smooth Rough Areas
Vinyl wrap loves a smooth, flat surface. If you’re working with wood, old paint, or anything slightly textured, give it a light sanding. I once wrapped an MDF drawer that looked flawless at first—but within a week, small bubbles appeared where tiny paint chips had been left behind.
Use fine-grit sandpaper (220 or higher) and gently buff down bumps, splinters, or flaky finishes. Then wipe it clean again to remove dust.
3. Dry the Surface Completely
Moisture is the enemy of good adhesion. Even if the surface feels dry, let it sit for at least 10–15 minutes after cleaning. I once rushed a project on a humid day, and the wrap peeled at the corners within hours. A quick pass with a hairdryer (or heat gun on low) can help if you’re in a hurry.
Common Mistakes to Avoid When Using Vinyl Wrap
Vinyl wrap can completely transform a space—but only if you apply it right. Trust me, I’ve learned the hard way that even small oversights can lead to bubbles, peeling edges, or wasted material. Here are some of the most common vinyl wrap mistakes—and how to avoid them.
1. Wrapping Dirty or Wet Surfaces
This is the number one reason vinyl fails to stick.
Any dust, grease, or moisture left on the surface will weaken the adhesive. I once skipped deep-cleaning my kitchen drawer fronts and the wrap started bubbling within days. Now, I always clean with a degreaser, rinse with water, and let everything dry overnight.
Pro tip: Use isopropyl alcohol for a final wipe—it removes any hidden oils without leaving residue.
2. Skipping the Heat Gun
You might think a heat gun is optional. It’s not—especially if you’re wrapping around corners, edges, or textured areas.
Heat softens the vinyl, making it stretchable and easier to mold. Without it, you’ll likely end up with wrinkles, poor adhesion, or corners that lift after a few days. I learned this lesson while wrapping the curved edges of my bathroom cabinet. With a heat gun, the finish looked factory-smooth.
No heat gun? A hair dryer works in a pinch, but it won’t get as hot or give you the same control.
3. Not Aligning Patterns (Like Wood Grain or Marble)
This one’s a visual deal-breaker.
When you’re working with patterned vinyl—like wood grain, marble, or tiles—alignment is everything. Misaligned grain can make your cabinets or furniture look odd and unprofessional. I once wrapped three drawers in a wood design without matching the pattern, and it looked like a jigsaw puzzle gone wrong.
The fix? Measure and pre-cut your vinyl with the pattern in mind. Lay everything out before applying so you can line it up perfectly.
How To Remove Stains from Vinyl Wrap
One of the great things about vinyl wraps is how easy they are to clean, but if you’ve ever had a stain that just won’t come off, you know it can be a bit tricky. After wrapping my bathroom vanity, I had a few mishaps with spills and sticky fingerprints. Here’s what I’ve learned about cleaning and maintaining vinyl wraps to keep them looking fresh.
Safe Cleaning Agents and Tools
When it comes to cleaning vinyl wraps, the best approach is to keep it simple. I’ve found that mild soap and warm water work wonders for most stains. For tougher spots, a bit of isopropyl alcohol (rubbing alcohol) is usually all you need. Just dampen a microfiber cloth with the alcohol and gently wipe down the surface. Avoid using anything too harsh, as it can damage the wrap over time.
Tip: I keep a microfiber cloth handy at all times because it’s gentle and doesn’t scratch the vinyl, unlike paper towels.
What to Avoid (Abrasives, Bleach, and Harsh Chemicals)
While cleaning, it’s tempting to grab the heavy-duty stuff, but trust me—abrasives and bleach are a no-go. I made the mistake of using a scrubbing pad once, and it left permanent scratches on my vinyl wrap. Bleach can also weaken the adhesive, causing it to peel. Stick to non-abrasive cleaners to keep your wrap intact.
Maintenance Routine Tips
Maintaining your vinyl wrap is simple with the right routine. I recommend cleaning your wrapped surfaces once a week to avoid buildup, especially in areas like kitchen counters or bathroom vanities where spills are common. Also, try to wipe up spills as soon as they happen—this prevents stains from setting in.
If you start noticing some fading or wear, a protective vinyl wrap spray can help rejuvenate the color and keep it looking like new. These sprays are designed to be gentle but effective, so they won’t harm the wrap.
Can Vinyl Wrap Be Removed?
One of the best things about vinyl wrap, especially for renters or those with changing tastes, is how easy it is to remove. But there are some important things to know before you peel it off.
How Easy Is It to Peel Off?
Vinyl wrap is designed to be removable, making it perfect for temporary transformations. In most cases, you can simply peel the wrap away from the surface. The vinyl is applied with an adhesive that is strong enough to hold but not so permanent that it leaves behind a mess.
Personal Tip: When I wrapped my bathroom vanity, I made sure to choose a wrap that wasn’t too thick. Thin wraps are easier to peel off without much hassle. However, if you’ve had your vinyl on for a while, it might be more stubborn. In that case, a little heat from a hairdryer or heat gun will loosen the adhesive, making removal even easier.
Thinking about a new look? Get a free quote from Fit Wrap and discover how affordable and stylish your vinyl upgrade can be.
Will It Damage the Surface?
You’ll be happy to know that vinyl wrap is generally safe for most surfaces. When removed properly, it shouldn’t cause any damage to the surface underneath, whether it’s wood, metal, or plastic. I’ve used vinyl wraps on my kitchen cabinets and furniture, and there was no damage to the wood or paint when I removed it. The key here is ensuring the surface is clean and smooth before application. Rough or uneven surfaces might cause the adhesive to bond too strongly, making removal trickier.
However, there’s a small chance that the wrap might peel off some paint or finish if the surface was already compromised. If you’re working on painted walls or newly finished furniture, do a test patch first to ensure it won’t pull anything up.
What to Expect Post-Removal?
Once the vinyl wrap is off, you might find some residual adhesive left behind. Don’t worry—this is completely normal. A simple adhesive remover or rubbing alcohol can do the trick in getting rid of any sticky residue. Just apply it to a cloth and gently wipe away the excess.
If you’re using vinyl wrap on items like furniture or cabinets, the surface should look just as good as it did before you applied the vinyl, minus any wear and tear caused by general use.
FAQ
Can you vinyl wrap any surface?
Yes, vinyl wrap can be applied to many surfaces, such as wood, metal, laminate, and glass. However, textured or porous surfaces need extra preparation. Learn which materials work best for vinyl wrapping.
What surfaces are ideal for vinyl wrapping?
Smooth, clean surfaces like sealed wood, metal, plastic, and glass are perfect for vinyl wrap. The key to success is prepping the surface properly before application.
Can you vinyl wrap bathroom tiles?
Yes, you can vinyl wrap bathroom tiles, but they must be smooth, clean, and non-porous. Use a heat gun around the edges for better adhesion and a smooth finish.
How do you prep a surface for vinyl wrap?
To prep, clean and degrease the surface thoroughly. Lightly sand any rough areas and ensure the surface is dry before applying vinyl wrap for the best results.
How long does vinyl wrap last?
When applied properly, vinyl wrap can last for several years, especially on flat, smooth surfaces. The lifespan depends on the material and the conditions it’s exposed to.
Can vinyl wrap be removed easily?
Yes, vinyl wrap can usually be removed easily. Use heat to loosen the adhesive, and gently peel off the vinyl without damaging the surface underneath.
Is vinyl wrap waterproof?
Vinyl wrap is water-resistant, but it’s not fully waterproof. It works well for low-splash areas like backsplashes but may not hold up in high-moisture zones like showers.
How do you clean vinyl wrap surfaces?
Clean vinyl wraps with mild soap and water. For tougher stains, use isopropyl alcohol on a microfiber cloth. Avoid harsh chemicals or abrasives that can damage the wrap.
Can you vinyl wrap furniture or appliances?
Yes, you can wrap furniture like desks or dressers and appliances like fridges. Vinyl wrap gives them a fresh new look, without the cost of replacing them.
Does vinyl wrap work for vehicle customization?
Vinyl wrap is a popular choice for vehicles. You can use it on the exterior or interior of cars to change their look or protect the original paint. It’s a cost-effective customization option.
Conclusion
So, can you vinyl wrap just about anything? The answer is a resounding yes—but only if you prepare properly. From kitchen cabinets to bathroom vanities, furniture, and even cars, vinyl wrapping can transform many surfaces into something fresh and modern. The key is knowing what works best and prepping the surface correctly.
Whether you’re aiming for a sleek marble finish or a rustic wood grain look, the versatility of vinyl wrap is hard to beat. However, it’s important to avoid certain surfaces—like raw drywall or fabric—that simply don’t lend themselves to this DIY project. And always remember: proper cleaning, sanding, and surface preparation are your best friends in ensuring a smooth, long-lasting finish.
My experience with wrapping a bathroom vanity taught me just how crucial it is to get the prep right. When you take the time to prep your surface, the results can be incredible. For beginners, I recommend starting small with something simple. Try wrapping a small piece of furniture or a drawer to get a feel for the process before taking on larger projects.
Vinyl wrapping can be an exciting way to breathe new life into old items. I encourage you to give it a go—you might just find a fun new hobby and an easy way to refresh your home or car or anything!