
Peeling off vinyl wrap may look easy—until you try it. One homeowner in Dubai learned this the hard way. She tugged at the corner of her cabinet, hoping for a quick fix. Instead, the wrap ripped, and the glue stuck. If you’re stuck wondering how to remove vinyl wrap without harm, this guide can help.
Wraps can bubble, fade, or just feel outdated. From removing kitchen wrapping in Dubai to tackling a bathroom wrap or door wraps, the need to refresh is common. You’ll also learn when it’s okay to DIY and when to get help. If you’re asking, “Can I paint over wrapped cabinets?” or “How do I clean up glue after I remove wraps in Dubai?”—you’re in the right place.
What is Vinyl Wrap and Where is it Used?
Vinyl wrap is a thin, adhesive-backed film used to cover and refresh surfaces. It’s often called an interior wrap because it transforms spaces without the mess of paint or full renovations. You’ve probably seen it on kitchen cupboard doors, bathroom walls, or even wardrobes—adding a modern look in just a few hours.
In homes across Dubai, vinyl wrap has become a go-to solution for fast makeovers. It’s budget-friendly, stylish, and easy to install. But like any trend, it doesn’t last forever. That’s why many are now looking to remove wraps in Dubai, especially when they peel, fade, or no longer match their decor.
A. Kitchen Cabinets
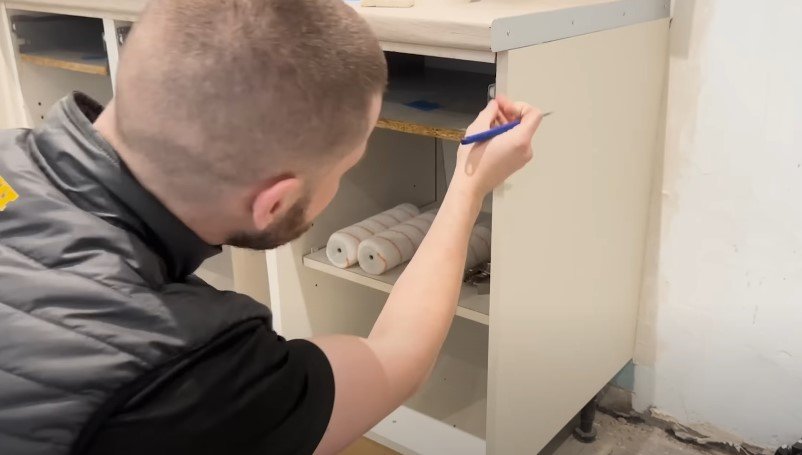
Vinyl wrap is most popular in kitchens. It covers cabinets and drawers to give them a sleek, clean look. But over time, Dubai’s humidity and cooking heat can wear the material down. We’ve seen many cases where clients needed help removing vinyl wrap from kitchen cupboard doors after five or six years. Whether it’s bubbling or just outdated, kitchen vinyl often needs a refresh.
B. Bathroom Surfaces
Bathrooms are another hotspot for vinyl wrap. It’s used to update vanities, tiles, and even bathtubs. But with daily steam and water exposure, bathroom wrap can lift at the edges or change color. That’s when people start asking, “Can I remove bathroom wrap without ruining the tiles?”
C. Interior Doors and Furniture
Vinyl also works well on interior doors, wardrobes, and furniture. We’ve seen renters in Dubai use door wraps to match their furniture or hide wear and tear. It’s a clever fix—until it’s time to move out or update the look. Then comes the challenge of removing interior wrap without leaving glue behind.
In short, vinyl wrap is a smart way to style your space—but only if you know how to apply and remove it right. And if you’re wondering how to remove vinyl wrap without damaging your surfaces, this guide covers every step.
When and Why You Should Remove Vinyl Wrap
Vinyl wrap can make your space look new—but it doesn’t last forever. Over time, you might notice signs that it’s time to let go. Maybe your kitchen cupboard doors are peeling, or your bathroom wrap is bubbling at the edges. These are clear signals that removal is needed.
Common Signs It’s Time to Remove Vinyl Wrap
- Peeling and Bubbling: The wrap lifts at corners or forms air pockets.
- Discoloration: The once fresh finish now looks dull or faded.
- Adhesive Breakdown: The glue underneath dries out or becomes sticky.
These issues don’t just affect looks—they can also make cleaning harder and attract dirt.
Remove Kitchen Wrapping Dubai – Common Scenarios from Local Homes
In Dubai, heat and humidity can speed up wear and tear. We’ve helped clients in areas like JVC and Downtown remove kitchen wrapping that had faded just two years after installation. One client had a wrap that started melting near her stove—she thought it was grease damage. But it turned out the adhesive had weakened from the heat.
Another family in Arabian Ranches called us when their door wraps began to bubble during summer. They thought it was a one-time issue, but it kept spreading. Once removed, the MDF door underneath needed sanding before it could be repainted.
These real-life cases show why timely wrap removal matters—especially in Dubai’s climate.
Can You Paint Over Wrapped Cabinets Instead?
It’s a common question: Can I just paint over the vinyl? Technically, yes—but it’s not ideal. Paint may not stick well, and peeling can happen fast. If the wrap is already lifting or cracked, it’s best to remove it first. That way, your new finish—whether paint or a fresh interior wrap—will look smoother and last longer.
Can You Remove Vinyl Wrap Yourself?
Yes—you can remove vinyl wrap yourself, but it needs care and patience. If you’re wondering how to remove vinyl wrap without damaging your surfaces, the answer lies in using the right tools and following the steps carefully. Many people in Dubai try DIY removal, especially when removing vinyl wrap from kitchen cupboard doors, bathroom wrap, or door wraps that are bubbling or peeling.
DIY vs Professional Removal
Doing it yourself can save money, and it feels good to fix things on your own. But vinyl removal isn’t always as easy as peeling a sticker. If the adhesive has aged or if the surface is delicate (like MDF), one wrong move can leave damage or residue behind.
On the other hand, professionals come with experience. They use heat safely, remove glue without leaving stains, and know how to deal with tricky spots—especially on curved surfaces like interior wrap edges or glossy finishes.
| DIY Pros | DIY Cons |
| Lower cost | Risk of surface damage |
| Learn a new skill | Takes more time |
| Can be done at your pace | May need special tools |
A Real Client Story
One client in Dubai Marina wanted to remove old door wraps herself. She used a hairdryer and managed to lift most of it. But some glue stayed stuck, and when she scrubbed too hard, the paint underneath came off. We helped her later to sand, clean, and apply a fresh wrap—but it took double the time.
On the flip side, a family in Mirdif tried removing kitchen wrapping before a remodel. They followed online tips, worked slowly, and it turned out well. They even reused some cabinet panels without repainting.
Tools & Materials You’ll Need
Before you begin, it’s important to have the right tools. Whether you’re removing vinyl wrap from kitchen cupboard doors, a bathroom wall, or interior door wraps, the process goes smoother—and safer—when you’re prepared. If you’re wondering how to remove vinyl wrap without damaging your surfaces, these essentials make all the difference.
1. Heat Gun or Hairdryer
This is your best friend during vinyl removal. A heat gun gives more control and higher temperatures, which helps soften the adhesive quickly. But if you don’t have one, a regular hairdryer can work too—it just takes a bit more time.
Pro Tip: Keep it moving! Holding heat too long in one spot (especially on MDF) can damage the surface underneath.
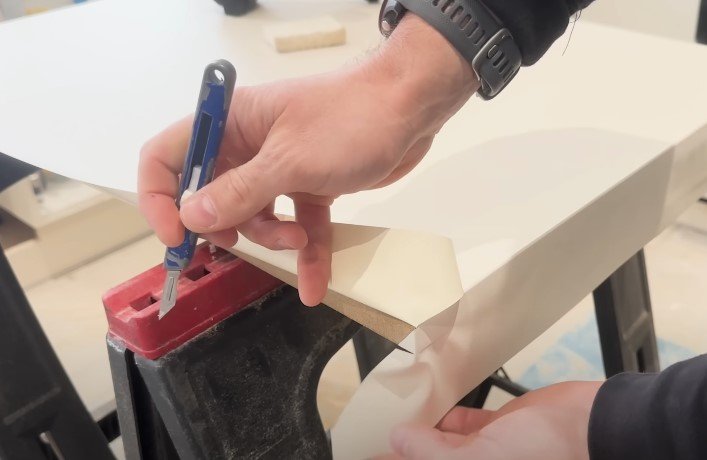
2. Plastic Scraper or Squeegee
Never use metal tools—they scratch easily. A plastic scraper or even an old loyalty card works well for lifting the corners of your wrap gently without causing gouges in paint or laminate.
3. Mild Adhesive Remover
After the vinyl is off, some sticky residue usually stays behind. Products like Goo Gone, rubbing alcohol, or citrus-based cleaners help remove this without harming your cabinets, bathroom wrap, or doors. Always spot test first!
4. Microfiber Cloths
These are gentle on all surfaces and great for wiping off loosened adhesive. Avoid rough cloths that can scratch glossy finishes, especially if you’re planning to repaint or re-wrap later.
5. Gloves and Basic Safety Gear
Gloves help protect your hands from heat and adhesive chemicals. A simple mask can help too if you’re using strong-smelling solvents in a closed area—common in smaller Dubai apartments or kitchens.
Step-by-Step Guide: How to Remove Vinyl Wrap
If you’re wondering how to remove vinyl wrap without damaging your surfaces, this guide covers every step. Whether you’re tackling a small bathroom wrap or peeling off vinyl from kitchen cupboard doors, the process is similar—and with the right approach, anyone can do it.
We’ve helped many Dubai homeowners remove aging or damaged vinyl, and here’s the method we recommend based on first-hand experience.
A. Preparation
1. Clean the Surface First
Start by wiping the area with a damp microfiber cloth. This removes surface dust and grime so heat and peeling are more effective.
If the vinyl is greasy—like in kitchens near the stove—use a mild detergent first.
2. Test a Corner
Find a loose edge or gently lift one with a plastic scraper. Don’t force it. This helps you understand how well the vinyl is bonded and whether it peels easily or needs more heat.
3. Protect Surrounding Areas
Cover nearby panels or countertops with a towel or drop cloth, especially when using heat. In one villa project in Jumeirah, a client accidentally melted the edge of a plastic plug socket while using a heat gun too close—lesson learned!
B. Heating the Vinyl
1. Use a Heat Gun or Hairdryer
Turn on your heat tool and keep it moving in small circles 10–15 cm away from the surface. Focus on a small area at a time—don’t try to heat the entire cabinet or wall in one go.
2. Be Extra Careful on MDF or Laminate
MDF (commonly used in kitchen cupboard doors) can swell if overheated. Use low-to-medium heat settings and keep the tool in motion to avoid warping or bubbling.
C. Peeling and Pulling
1. Start from a Loosened Edge
Once the vinyl feels warm and soft, begin peeling slowly from your test corner. Use a shallow angle and even pressure—think “peel like a sticker,” not “rip like duct tape.”
2. Let Gravity Help
If removing wrap from cabinet doors, take the door off and lay it flat. Or pull downward so gravity assists in the peeling process. Slower is better—rushed removal often leaves behind more residue or tears.
D. Removing Residual Adhesive
1. Use Mild Adhesive Remover
Once the wrap is off, you’ll likely see sticky patches left behind. Apply Goo Gone, rubbing alcohol, or a citrus-based cleaner and let it sit for a few minutes.
2. Wipe Gently with Microfiber Cloths
Don’t scrub with abrasive tools. Just use firm, circular motions with your cloth until the surface feels smooth again.
3. Repeat if Needed
Some wraps—especially older ones—may take a couple of passes. In a recent client case in Downtown Dubai, the homeowner had to clean a single kitchen door three times because of how dry and tacky the adhesive had become after years in a hot, humid space.
Final Check
Once everything is clean and dry, inspect the surface for any damage. If you plan to repaint or re-wrap, lightly sanding and priming the surface may help prep it for a flawless finish.
Professional Removal Services in Dubai
Sometimes, removing vinyl wrap is just too much to handle alone—especially when you’re dealing with stubborn adhesive, fragile MDF surfaces, or intricate wrap designs on interior doors. That’s when calling in the professionals can save you time, stress, and costly mistakes.
Many Dubai homeowners start with DIY hopes but quickly realise that peeling vinyl isn’t always as simple as it looks on YouTube.
When Should You Hire a Pro?
Here are some signs it’s time to get expert help:
- The vinyl is cracked or brittle. Old wraps often break off in tiny pieces, making removal painfully slow.
- You’re working with large or delicate areas. Removing vinyl wrap from kitchen cupboard doors, bathroom panels, or curved furniture requires careful handling to avoid surface damage.
- You plan to re-wrap or paint soon. A pro can ensure the surface is left clean, smooth, and ready for its next upgrade.
Fit Wrap and similar Dubai-based services know how to deal with these challenges because they’ve seen them all—bathroom wraps that won’t budge, adhesive that’s bonded to the core, and MDF doors on the verge of swelling.
What Do Professionals Do Differently?
Here’s how the pros elevate the process:
- They use commercial-grade heat tools that offer better temperature control for safe, even heating.
- They work faster and cleaner, avoiding scratches, burns, or leftover adhesive that can ruin your surface.
- They assess the surface condition and adjust their removal technique accordingly—no guessing or trial and error.
One of the biggest advantages? They’re insured. If something goes wrong, you’re not left with damaged panels or a half-peeled kitchen.
How Fit Wrap Handles Vinyl Wrap Removal
At Fit Wrap, removal isn’t rushed. Every project starts with a quick site viewing, followed by a clear plan of action based on your surface type and the condition of the vinyl.
In a recent job in Dubai Marina, a client wanted to remove kitchen wrapping after six years of wear and discoloration. The vinyl had hardened, and adhesive had seeped into the corners of the MDF cabinets. A DIY attempt would’ve likely torn the veneer or caused swelling. Instead, the Fit Wrap team finished the job in under four hours—clean, safe, and with the surface perfectly prepped for a modern re-wrap.
Common Mistakes to Avoid When Removing Vinyl Wrap
Even with the best intentions, it’s easy to make mistakes when removing vinyl wrap—especially if you’re doing it for the first time. Whether you’re working on kitchen cupboard doors, interior door wraps, or even bathroom vinyl, avoiding these common errors can save you from damaging your surfaces or wasting time.
1. Pulling Too Fast or at the Wrong Angle
One of the biggest rookie mistakes? Yanking the vinyl off in one quick motion. It might feel satisfying at first, but this often leads to tearing or even pulling up the surface underneath—especially on MDF cabinets or fragile laminated doors.
👉 Tip: Always peel at a shallow angle (think 45 degrees or less) and go slowly. Let the heat do the hard work.
2. Using Metal Tools
It’s tempting to grab a metal scraper when the vinyl is being stubborn. But using sharp tools can gouge wood, scratch painted finishes, or dent soft surfaces.
👉 Tip: Stick to a plastic scraper or old credit card to lift edges safely.
3. Skipping Heat or Overheating
Some people try to peel cold vinyl. Others go overboard with a heat gun. Both can cause problems. Cold vinyl tends to crack, while excessive heat can warp underlying materials—especially sensitive bathroom panels or interior wrap over MDF doors.
👉 Tip: Use a medium heat setting and move in circles to warm the area evenly without burning it.
4. Ignoring Adhesive Residue
Removing the vinyl is only half the job. If you leave adhesive behind, your surface will stay sticky, collect dust, and look messy. Worse, it can affect how well paint or new wrap sticks later.
👉 Tip: Use rubbing alcohol or a gentle remover like Goo Gone, followed by a microfiber cloth to wipe clean.
5. Not Testing a Corner First
Every wrap behaves differently depending on how long it’s been applied and the type of vinyl used. Jumping in without testing can lead to frustration or damage.
👉 Tip: Always test a small corner first to check how the vinyl reacts to heat and how easily it peels.
Aftercare: What’s Next After Removing Vinyl Wrap
Once you’ve removed the vinyl wrap—whether from kitchen cupboard doors, interior door wraps, or bathroom panels—you might wonder, “What now?” The good news is, you’ve already done the hard part. Now it’s time to clean, repair, and prep your surfaces for their next chapter.
1. Inspect the Surface Carefully 👀
After peeling off the vinyl and cleaning the adhesive, always check the surface underneath. Look for scratches, dents, or areas where the adhesive may have slightly lifted the paint or coating.
👉 Tip: If you’re dealing with MDF or laminate, watch out for moisture damage or warping, especially in Dubai’s humid bathrooms.
2. Decide What’s Next: Rewrap, Paint, or Replace?
This is where it gets exciting! You now have a few solid options depending on your style, budget, and the condition of the surface:
- Rewrap with Higher-Quality Vinyl: If you loved the wrapped look but want a fresher or more modern design, rewrapping is a great choice. Many Dubai homes upgrade to textured or heat-resistant vinyl for longer durability.
- Painting: Yes, you can paint over wrapped cabinets—but only after proper prep. If you’ve removed the vinyl, lightly sand the surface, clean it, and use a primer for a smooth paint job.
- Replace Panels or Doors: In rare cases where the base is damaged beyond repair, replacement might be more cost-effective than patching things up.
3. Clean One Last Time
Before applying anything new—whether it’s paint or another wrap—make sure the surface is free from dust, oil, or leftover cleaner. A final wipe with a microfiber cloth and rubbing alcohol ensures perfect adhesion and a clean finish.
4. Protect and Maintain
If you’re leaving the surface unwrapped for now, consider applying a clear sealant or polish to protect wood, laminate, or MDF from dust and moisture. Especially in kitchens and bathrooms, daily wear can sneak up quickly.
Choosing the Right Service: Why Fit Wrap Is Your Best Option
So, you’ve removed your vinyl wrap—or you’re thinking about it—but you’re unsure what to do next. Maybe you’re planning a rewrap, a redesign, or just want help from someone who knows the ins and outs of vinyl. That’s where Fit Wrap comes in—Dubai’s trusted name in kitchen wrapping, interior door wraps, and beyond.
A Team That Knows Dubai Homes
Not every vinyl wrap service understands the unique challenges of Dubai’s climate and interior styles. But Fit Wrap does. From humid bathroom conditions to sun-exposed doors and cupboards, they’ve seen it all. Whether it’s a sleek kitchen in Downtown or a traditional villa in Mirdif, their solutions are tailored to your space.
Premium Materials That Last
Cheap vinyl wraps? No, thank you. Fit Wrap only uses high-quality, durable vinyl designed for long-term use. These materials resist heat, humidity, and wear—perfect for busy kitchens, steamy bathrooms, or high-touch interior door wraps. Plus, they come in hundreds of colours, finishes, and textures.
A Full Range of Services
From vinyl wrap removal to new installations, Fit Wrap offers a full suite of services to transform your space:
- Kitchen wrapping and unwrapping
- Wardrobe and interior door vinyl wrapping
- Bathroom surface wraps
- Floor and wall vinyl styling
- Custom wrap designs to match your vision
They don’t just wrap—they redesign, refresh, and revive your space.
Why It Matters
Many people try to cut corners with DIY, only to damage their surfaces or end up unhappy with the finish. With Fit Wrap, you’re not just paying for service—you’re investing in peace of mind. Their team works cleanly, efficiently, and always with care.
Ready to Refresh Your Home?
Book a viewing with Fit Wrap today and get expert advice tailored to your needs. Whether you’re looking to remove kitchen wrapping in Dubai, rewrap your bathroom walls, or upgrade a tired wardrobe, Fit Wrap has the tools and talent to get it done right.
👉 “Your space deserves more than a quick fix. It deserves a finish that lasts—and that’s what Fit Wrap delivers.”
Conclusion
If you’re wondering how to remove vinyl wrap without damaging your surfaces, the truth is—it’s totally doable with the right approach. Whether it’s old kitchen cupboard doors, bathroom wraps, or interior door wraps, careful removal can restore your space and open doors to new design possibilities.
Vinyl wrap has changed the way many Dubai homes look and feel. But like all design elements, there comes a time for change. Maybe the wrap is peeling, outdated, or simply no longer your style. Whatever the reason, removing it safely is the first step toward a fresh, modern upgrade.
And remember, you don’t have to go it alone. If the idea of using a heat gun or dealing with sticky adhesive feels overwhelming, a professional service like Fit Wrap can make the process smooth and stress-free. Their team handles everything—from careful removal to rewrapping—with skill, care, and materials that last.
👉 Looking to remove vinyl wrapping in Dubai? Get expert help from Fit Wrap and bring new life to your kitchen, bathroom, or interior surfaces—without the mess or guesswork. Book your consultation today and start your transformation with confidence.